

How To Create Assets For Unity
How does a game gain traction and become a hit? There's no secret recipe, but letting players take full control of the game and customize it to their liking with streaming assets is a powerful selling feature for sure.
In this tutorial, you'll use the streaming assets directory under Unity to let your users customize the game's UI, soundtrack, player model, and even create their own levels!
Along the way, you'll learn:
- How the Streaming Assets directory works.
- How to load resources from the Streaming Assets directory at runtime.
- How to harness the data from files added by your users.
Note: You'll need to be familiar with some basic C# and know how to work within the Unity 2017.1 development environment. If you need some assistance getting up to speed, check out the Unity tutorials on this site.
Getting Started
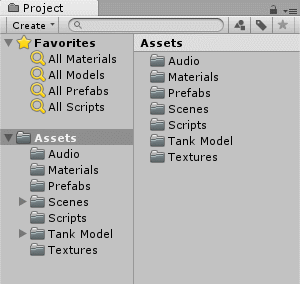
Download the starter project here, and unzip and open the TankArena_Starter project in Unity. Another folder called TankArenaAllAssets is included with some sample assets you can use later on in this tutorial.
Note: Credit goes to Eric, our venerable Unity Team Leader for the tank model. I've been dying for find a use for that tank! The royalty-free music later in the tutorial is from the excellent Bensound. Finally, thanks to my kids who helped create some of the custom content!

Hit play and you'll find yourself in a little tank in a little arena. Your goal is to proceed to the glimmering tower of light that constitutes the target tile. But be warned — there are a number of obstacles you need to avoid or destroy in order to reach your goal.
The game as it stands is a little "meh", so you'll add some on-demand assets to let the player customize the game and create some exciting levels.
Loading Resources at Runtime
There are several ways to serve up resources to Unity at runtime, and each method has its place in game development: asset bundles, resource folders, and streaming assets. Let's look at each one in turn.
Asset Bundles
Asset bundles let you deliver content to your application outside of your Unity build. Generally, you'd host these files on a remote web server for users to access dynamically.
Why use asset bundles? When developing cross-platform games, you may need to create more than one texture or model to respect the limitations of the target platform. Asset bundles let you deliver the appropriate asset on a per-platform basis while keeping the initial game install size to a minimum.
Asset bundles can contain anything from individual assets to entire scenes, which also makes them ideal for delivering downloadable content (DLC) for your game.
Resource Folders
Unlike Asset bundles, resource folders are baked into the Unity Player as part of the game. You can do this by adding the required assets to a folder named Resources in your assets directory.
Resource folders are useful for loading assets at runtime that would not normally be part of the scene or associated with a GameObject. For example, an extremely rare event or hidden object that's not seen often is not something you'd want to load 100% of the time.
Streaming Assets
Like Resource Folders, a Streaming Assets directory can be created by intuitively creating a folder named StreamingAssets in your project's assets directory. Unlike Resource folders, this directory remains intact and accessible in the Unity player. This creates a unique access point for users to add their own files to the game.
Adding Streaming Assets
In the assets window, click on Create and add a new folder to your project. Rename the folder StreamingAssets.
Now click on File\Build Settings and ensure the Target Platform is correctly assigned to the platform you are working on. Click Build to build the player. Navigate to where you output the Unity player.
- On a PC, look in the accompanying folder titled <SaveName>_Data.
- On a Mac, right-click the player and click Show Package Contents. From the popup Finder window, navigate through Contents\Resources\Data.
Any file or folder you drop into there will be accessible to your game. Feel free to drop files directly into the StreamingAssets folder in your Project view so you can quickly test in the Editor as you go.
Adding your First Image
Who is going to step up the plate and take on TankArena? Is it you? Your pet? Your favorite soft toy when you were a kid? Grab a saved photo of them and drag it into the StreamingAssets directory you created in the Project Window. I chose my fearless cat Nando.
If you want to forgo collecting and/or creating a bunch of assets to import, feel free use the assets included in the starter project download under the TankArenaAllAssets folder. I'm sure Nando will not let you down either.
You need to rename your image asset for two reasons:
- The name must contain a specific key word so the game will know what to do with the image.
- The additional text in the file name will give you something to parse to give your hero a screen name.
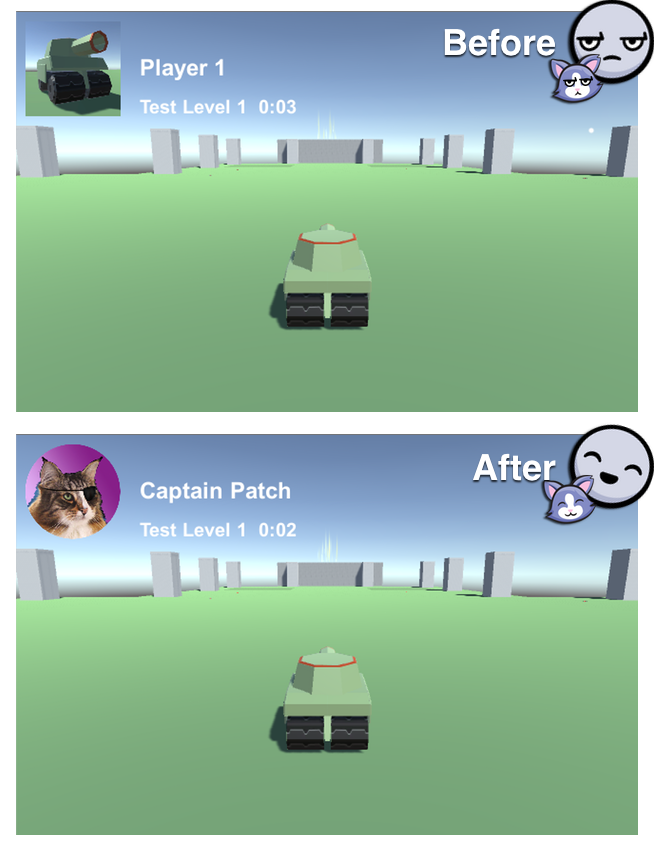
Rename your image asset in the format "player1 <name>.png". For example, I named my picture of Nando player1 Captain Patch.png.
Most of the files you add will have a similar format. They'll have a tag to help identify them to the game, and subsequent text will enable you to add additional parameters to play with.
Loading your First Resource
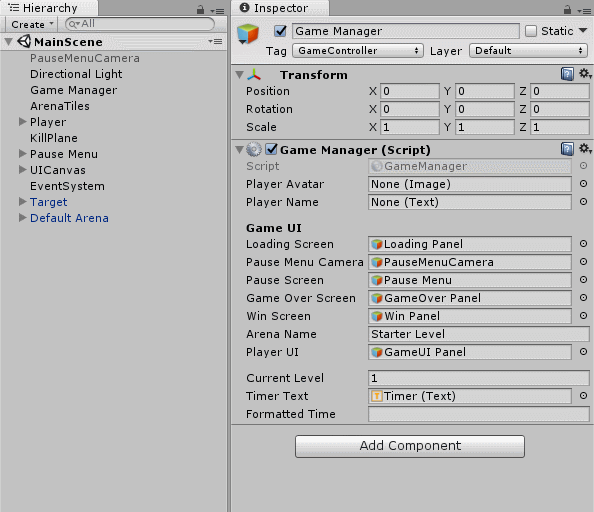
In the Project Window, navigate to Assets\Scripts and double click on the Game Manager Script to open it in the IDE of your choice.
Under the class declaration, add these public variables to reference the UI Game Objects you will customize:
public Image playerAvatar; public Text playerName; Before you add any code to find and access the files in your streaming assets directory, you will need to add the following to the top of your GameManager script:
using System.IO; This adds support for files and directories and allows the reading and writing of files.
Add the following to Start() under playerTank = GameObject.FindGameObjectWithTag("Player");:
DirectoryInfo directoryInfo = new DirectoryInfo(Application.streamingAssetsPath); print("Streaming Assets Path: " + Application.streamingAssetsPath); FileInfo[] allFiles = directoryInfo.GetFiles("*.*"); The streaming assets directory resides in different locations depending on the platform. However, Application.streamingAssetsPath will always return the correct path. The entirely optional print statement will show you to see where your streamingAssetsPath points.
The final line creates an array containing all the files in the streaming assets directory. You will create a series of conditionals as you work through this tutorial to handle the files found.
To send the player's image to be processed, add the following under the code you just added:
foreach (FileInfo file in allFiles) { if (file.Name.Contains("player1")) { StartCoroutine("LoadPlayerUI", file); } } The foreach loop iterates through the files, and the conditional checks to see if the file name contains the key word "player1". Once found, the file is passed to a Coroutine LoadPlayerUI() which you'll add next:
IEnumerator LoadPlayerUI(FileInfo playerFile) { //1 if (playerFile.Name.Contains("meta")) { yield break; } //2 else { string playerFileWithoutExtension = Path.GetFileNameWithoutExtension(playerFile.ToString()); string[] playerNameData = playerFileWithoutExtension.Split(" "[0]); //3 string tempPlayerName = ""; int i = 0; foreach (string stringFromFileName in playerNameData) { if (i != 0) { tempPlayerName = tempPlayerName + stringFromFileName + " "; } i++; } //4 string wwwPlayerFilePath = "file://" + playerFile.FullName.ToString(); WWW www = new WWW(wwwPlayerFilePath); yield return www; //5 playerAvatar.sprite = Sprite.Create(www.texture, new Rect(0, 0, www.texture.width, www.texture.height), new Vector2(0.5f, 0.5f)); playerName.text = tempPlayerName; } } Why a Coroutine? Although loading this image will happen very quickly, you will soon be loading and manipulating many more files. A Coroutine runs off the main thread and will not interrupt the game loop.
On to the code:
- The conditional at the start of the function checks to ensure the file name does not contain meta. If so, the file is likely to be the Unity generated backup file and the function exits. This snippet will be repeated in subsequent file processing coroutines.
- The file name is saved without the extension and subsequently split into a string array containing the individual words.
- An empty string is created for the player's name. The
foreachloop iterates through theplayerNameDataarray. Each item in the array except for the first one (player1) is concatenated to theplayerNamestring. - The full path of the file is needed to load a WWW Object.
yield returnensures execution of the function is delayed until the file is loaded. - A sprite is created with the loaded texture and applied to
playerAvatar.playerNameis populated using thetempPlayerNameyou constructed.
Before you hit that play button to see the fruits of your labor, remember to connect the playerAvatar and playerName to their respective Game Objects in Unity.
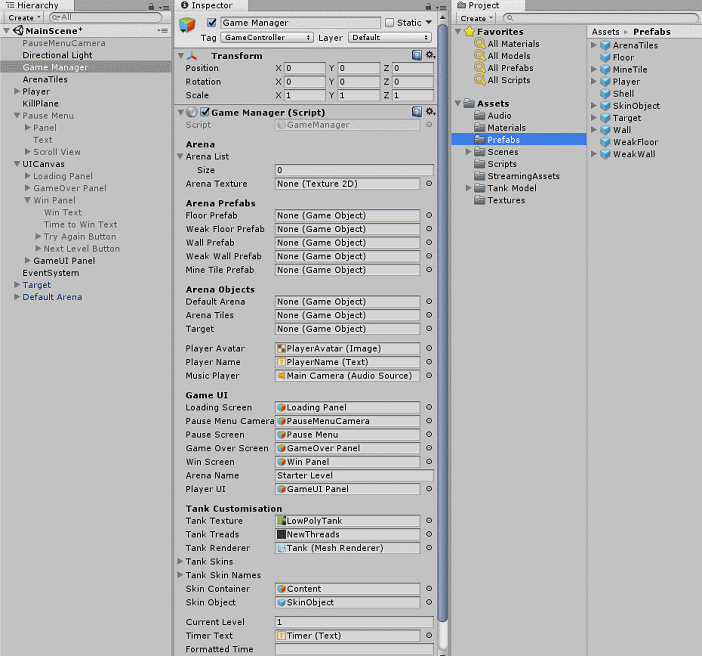
In the Unity Editor, select the Game Manager from the Hierarchy Window to expose the public variables in the inspector. Hold Alt and click on the disclosure triangle next to UICanvas in the Hierarchy Window. This should expand UICanvas and all of its children's children.
Under the GameUIPanel drag PlayerAvatar and PlayerName to their identically named public variables on the Game Manager in the Inspector:
Press the play button and check out your new avatar and name label. Nice!
But wait! There is no way your awesome new avatar would jump into their tank without their own custom soundtrack, right? On to that next.
Beat the game to your own Beats!
There's a soundtrack.ogg bundled with the resources for your use, but if you think you can find something even more epic, use that instead.
Drag your audio file into the Project Window StreamingAssets folder and rename the file soundtrack.
Note: There are many different audio file types out there. If you have trouble, convert the file to .ogg as it is a well supported format in Unity. Have a look here for free online conversion tools, but be warned: DRM-protected files will not convert.
Add a new public variable to the GameManager:
public AudioSource musicPlayer; With the GameManager selected in the Hierarchy Window, connect this new variable to the AudioSource on the scene's Main Camera by dragging the whole Main Camera over the variable in the Inspector.
The Main Camera is a child of your Player's Tank model, so it obediently follows you around. Remember, you can use the hierarchy's search box to find any Game Object quickly in the scene.

Head back to the GameManager Start() function and add a new conditional underneath the other one to pass the soundtrack file to a new Coroutine:
else if (file.Name.Contains("soundtrack")) { StartCoroutine("LoadBackgroundMusic", file); } Under the LoadPlayerUI Coroutine, add a new Coroutine titled LoadBackgroundMusic.
IEnumerator LoadBackgroundMusic (FileInfo musicFile) { if (musicFile.Name.Contains("meta")) { yield break; } else { string musicFilePath = musicFile.FullName.ToString(); string url = string.Format("file://{0}", musicFilePath); WWW www = new WWW(url); yield return www; musicPlayer.clip = www.GetAudioClip(false, false); musicPlayer.Play(); } } This code should look pretty familiar. Loading an audio file is very similar to loading a texture. You use the URL to load the file and then apply audio to musicPlayer's clip property.
Finally, you call Play() on musicPlayer to get the soundtrack thumping.
Click play and hit that first level even harder than would have been possible before!
Player Model Customization
Now to customize the tank model. You'll be walked through two different approaches for customizing the tank model. The first will use simple color swatches to let the user apply their favorite colors to the tank. The second will be a complete re-skin, similar to Minecraft skin mods.
Find the small 20 x 10 pixel playercolor image in the TankArenaAllAssets resources folder that came with the starter project download.
Drag the file into the Project Window StreamingAssets folder as you've done before.

You thought this was going to be hard?
Add the following new variables to the Game Manager, all under the new Header tag Tank Customisation:
[Header("Tank Customisation")] public Texture2D tankTexture; public Texture2D tankTreads; public Renderer tankRenderer; private Texture2D newTankTexture; private Vector3 defaultTankPrimary = new Vector3(580, 722, 467); private Vector3 defaultTankSecondary = new Vector3(718, 149, 0); The Game Manager will need to reference the tank models' textures and the renderers so that changes can be made and the model reassembled. Additionally, you save the military green primary and red accent secondary color values as integers in a Vector3 for the upcoming conditional statements. You're using Vector3 as opposed to Color, since comparing one Color to another is very unreliable.

This is the tanks Texture file as output by the 3D modeling program.
Jump back into Start() and add another conditional:
else if (file.Name.Contains("playercolor")) { StartCoroutine("LoadPlayerColor", file); } Under the LoadBackgroundMusic() Coroutine, add the following;
IEnumerator LoadPlayerColor(FileInfo colorFile) { //1 if (colorFile.Name.Contains("meta")) { yield break; } else { string wwwColorPath = "file://" + colorFile.FullName.ToString(); WWW www = new WWW(wwwColorPath); yield return www; Texture2D playerColorTexture = www.texture; //2 Color primaryColor = playerColorTexture.GetPixel(5, 5); Color secondaryColor = playerColorTexture.GetPixel(15, 5); //3 Color[] currentPixelColors = tankTexture.GetPixels(); Color[] newPixelColors = new Color[currentPixelColors.Length]; //4 float percentageDifferenceAllowed = 0.05f; int i = 0; foreach (Color color in currentPixelColors) { Vector3 colorToTest = new Vector3((Mathf.RoundToInt(color.r * 1000)), (Mathf.RoundToInt(color.g * 1000)), (Mathf.RoundToInt(color.b * 1000))); if ((colorToTest - defaultTankPrimary).sqrMagnitude <= (colorToTest * percentageDifferenceAllowed).sqrMagnitude) { newPixelColors.SetValue(primaryColor, i); } else if ((colorToTest - defaultTankSecondary).sqrMagnitude <= (colorToTest * percentageDifferenceAllowed).sqrMagnitude) { newPixelColors.SetValue(secondaryColor, i); } else { newPixelColors.SetValue(color, i); } i++; } //5 newTankTexture = new Texture2D(tankTexture.width, tankTexture.height); newTankTexture.SetPixels(newPixelColors); newTankTexture.Apply(); //6 ApplyTextureToTank(tankRenderer, newTankTexture); } } - There's the good old meta check.
- You save the color data of a pixel on the left side and the right side of the color swatch in these two variables.
- You then create two Color arrays. The first,
currentPixelColorscontains all of the color information from the tank's default texture. The second,newPixelColorswill be populated with same color information — but only once the custom color scheme has been applied. That's why you can instantiate it with the size of the first array. - The
foreachloop takes each pixel from the currentPixelColors and tests it.
If the color matches thedefaultTankPrimaryyou hard coded, the newprimaryColorvalue is saved in its place to the newPixelColor array. If the color matches thedefaultTankSecondary, save the newsecondaryColor; if the color matches neither, simply save the same color back. - Once the newPixelColors array is populated, you create a new
texture2Dand callApply()to save all pixel changes. - What is this strange method? Fear not, you'll write that next.
Add the following method under the one you just created:
public void ApplyTextureToTank(Renderer tankRenderer, Texture2D textureToApply) { Renderer[] childRenderers = tankRenderer.gameObject.GetComponentsInChildren<Renderer>(); foreach (Renderer renderer in childRenderers) { renderer.material.mainTexture = textureToApply; } tankRenderer.materials[1].mainTexture = textureToApply; tankRenderer.materials[0].mainTexture = tankTreads; } ApplyTextureToTank() takes two arguments: the tank Renderer and the new Texture2D that you want to apply. You use GetComponentsInChildren to fetch all of the renderers in the tank model and apply the new modified texture.

With the primary and secondary colors replaced. The texture is applied to the tank.
GetComponentsInChildren, rather counter-intuitively, fetches the requested component in the parent GameObject. In this particular model, the tank treads have their own texture. You have to reapply this, otherwise your tank will have "tank" tank treads, and that's just weird!
You also place this part of the tank customization in it's own public method as you'll need identical functionality to this later.
The final step is to connect up the new public Game Manager variables in the Inspector.
Ensure Game Manager is selected in the Hierarchy Window. In the Project Window, look in the Assets\Tank Model directory. You will find the two default texture files used to skin the tank model. Drag the LowPolyTank to the Tank Texture and NewThreads to the Tank Treads variable. Back in the Hierarchy Window, drag Player\Tank to Tank Renderer.

Click play and check out your sharp new Tank:

Here are a few other examples I created earlier.
More than One Way to Skin a Tank
The other way to customize tanks is to let the user add new skins to streaming assets and let them select and apply them at runtime.
There's a ScrollView and a Skin Object prefab situated in the Pause menu that you can use for the UI.

The SkinObject prefab is customised using the texture and filename.
Each skin will be showcased by a tank, and a button will enable you to add it.
Some tank "skin" textures were included in the TankArenaAllAssets folder that you got along with the starter project download. Place them in the Project Window StreamingAssets folder now.
Head back to the Game Manager script to get this new feature working.
The skins and their names will be stored in Lists. Therefore, add the Generic namespace at the top of the Game Manager script;
using System.Collections.Generic; Add the following variables under your other tank customization variables;
//1 public List<Texture2D> tankSkins; public List<string> tankSkinNames; //2 public GameObject skinContainer; public GameObject skinObject; //3 private bool skinMenuAssembled = false; - When a skin is found, this adds the texture to the
tankSkinslist and its name to thetankSkinNameslist. - To instantiate a Skin Object in the ScrollView, you require a reference to both the prefab to instantiate and the container which will be its parent.
- Finally a Boolean is used to determine whether you have already processed and assembled the skin list in the ScrollView. This will be used to ensure this process is not repeated unnecessarily between level restarts.
As before, add another conditional to the start function:
else if (file.Name.Contains("skin")) { StartCoroutine("LoadSkin", file); } Create a new coroutine to process the skin files:
IEnumerator LoadSkin(FileInfo skinFile) { if (skinFile.Name.Contains("meta")) { yield break; } else { //1 string skinFileWithoutExtension = Path.GetFileNameWithoutExtension(skinFile.ToString()); string[] skinData = skinFileWithoutExtension.Split(" "[0]); string skinName = skinData[0]; //2 string wwwSkinPath = "file://" + skinFile.FullName.ToString(); WWW www = new WWW(wwwSkinPath); yield return www; Texture2D newTankSkin = www.texture; tankSkins.Add(newTankSkin); tankSkinNames.Add(skinName); } } - The name of the skin is the first word in the filename.
- There may be multiple skin files to process. At this stage, the textures and the names are simply added to lists.
Note: For this tutorial, you simply throw up a loading screen for one second before gameplay starts as this is sufficient for demonstration purposes. For a real game, you may want to add a cool little cut scene if you expect a more involved loading stage, and perhaps a callback of some sort when loading is finally complete.
For this tutorial, you'll assume that when the loading screen dismisses, all of the streaming assets have been processed.
Add the following to the end of RemoveLoadingScreen():
if (!skinMenuAssembled) { StartCoroutine("AssembleSkinMenu"); } Create a new Coroutine and add the following code:
IEnumerator AssembleSkinMenu() { skinMenuAssembled = true; int i = 0; //1 foreach (Texture2D skinTexture in tankSkins) { GameObject currentSkinObject = Instantiate(skinObject, new Vector3(0, 0, 0), Quaternion.identity, skinContainer.transform); //2 currentSkinObject.transform.localPosition = new Vector3(100 + (200 * i),-80,0); //3 SkinManager currentSkinManager = currentSkinObject.GetComponent<SkinManager>(); currentSkinManager.ConfigureSkin(tankSkinNames[i], i); ApplyTextureToTank(currentSkinManager.tankRenderer, tankSkins[i]); i++; } yield return null; } - The
foreachloop iterates throughtankSkins. For each item, you instantiate a Skin Object and add it to the content object in the ScrollView. - The position of the Skin Object in the Scrollview is offset depending on the index of the list. This ensures all of the skins are neatly spaced out in the view.
- You fetch the SkinManager script in Skin Object and pass it the skin's name and index in the list. You reuse
ApplyTextureToTank()to apply the custom skin to the Skin Object's tank.
Navigate to the Scripts folder in the Project Window and double click on SkinManager script to open it in your IDE.
ConfigureSkin() saves the index it was passed in a private variable and the button label is customized using the skin name.
When the player presses the button to apply a skin, ApplySkinTapped() sends the saved index back to ApplySkin() in the GameManager.
Finish off ApplySkin() at the bottom of the GameManager Script by adding the following code:
ApplyTextureToTank(tankRenderer, tankSkins[indexOfSkin]); PlayerUI.SetActive(true); pauseMenuCamera.SetActive(false); isPaused = false; Time.timeScale = 1.0f; This extracts the relevant texture from the list and applies it to the players tank. You also remove the pause menu and resume gameplay.
Time to get this all hooked up!
Tap on the Game Manager in the Hierarchy to reveal the Game Manager script in the Inspector. Drag the Skin Object prefab from the Project Window Prefabs folder to the public skinObject variable in the Inspector.
Type content in the Hierarchy search field to find the ScrollView's content object without losing the Game Manager in the inspector (or tap the lock icon at the top right in the inspector view). Finally, drag the content object into the skinContainer variable.

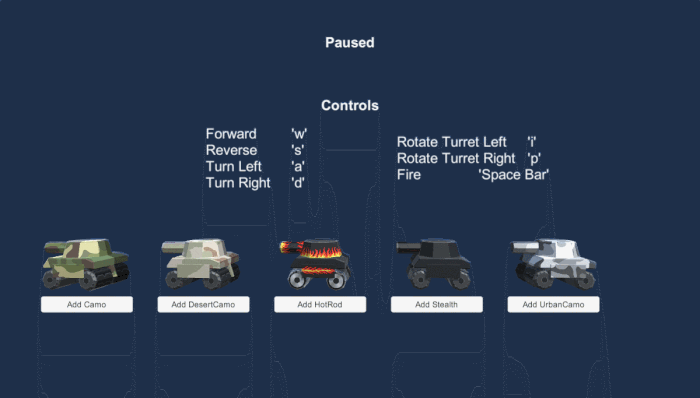
Tap the play button and press Escape to pause the game. Tap a button and select a new skin for the tank:
Level Design, Now you are Playing with Power!
Okay, it's time to move on to custom level design and creation. Interestingly, you won't need more skills than you've already learned.
First, have a look at the anatomy of an arena so you can get a feel of how it will be constructed.
In the Hierarchy View, double-tap on the Default Arena Game Object to select it and bring it into view in the Scene View. The Arena is constructed from hundreds of tiles, and each tile type is a prefab from the Prefab folder in the Project View. You will use these prefabs to assemble a level in any combination or permutation you can imagine.
The other day I was sitting down with my kids and I asked them if they wanted to design a level for my upcoming tutorial. It went something like this:

Suffice to say I got the kids on the computer and they created two levels from their designs.
You can find these custom levels in the included starter download TankArenaAllAssets folder.
Have a look at the files, by using any image editor a fairly complex level can be constructed...
Now you will create your own custom level and write the code to load any of these levels up.
Open the image editor of your choice and create a new document/canvas 100 px X 100 px square.
Use a hard 1 px pencil tool or line tool to create objects using the following color scheme.

A 100 x 100 level created with any image editing package.
Use the cursor tool to get the x and y coordinates of where you would like the player to start and where the target tile should be.
Save the file as a png when you are finished using the following naming scheme.
arena <x coordinate of player start> <y coordinate of player start> <x coordinate of target> <y coordinate of target> <Name of your level>.png
Once you are happy with your design, add the file to the Project Window StreamingAssets folder.
Head back to the Game Manager. Above the class declaration, add the following code:
[System.Serializable] public class Arena { public string arenaFilePath; public int levelNumber; public string levelName; public float startX; public float startZ; public float targetX; public float targetZ; } This creates an Arena class, containing all of the variables necessary to accommodate the data extracted from an arena file. The Serializable property allows this class to be displayed in the inspector.
Add a new list to the GameManager that will hold all of the instances of the Arena class you create:
[Header("Arena")] public List<Arena> arenaList = new List<Arena>(); Add the following additional public variables to the GameManager under the arenaList:
public Texture2D arenaTexture; [Header("Arena Prefabs")] public GameObject floorPrefab; public GameObject weakFloorPrefab; public GameObject wallPrefab; public GameObject weakWallPrefab; public GameObject mineTilePrefab; [Header("Arena Objects")] public GameObject defaultArena; public GameObject arenaTiles; public GameObject target; [Space] These variables comprise all of the building blocks for the level and serve as references to the player and the target object so you can customize their position. You also reference the defaultArena so we can remove it, and arenaTiles so that you have a container for new instantiated tiles.
Just like you did previously, add a new conditional statement to the start function:
else if (file.Name.Contains("Arena")) { StartCoroutine("LoadArena", file); } Create a new coroutine named LoadArena():
IEnumerator LoadArena (FileInfo arenaFile) { if (arenaFile.Name.Contains(".meta")) { yield break; } else { //1 Arena arenaInstance = new Arena(); string arenaFileWithoutExtension = Path.GetFileNameWithoutExtension(arenaFile.ToString()); string[] arenaDataArray = arenaFileWithoutExtension.Split(" "[0]); arenaInstance.startX = int.Parse(arenaDataArray[1]); arenaInstance.startZ = int.Parse(arenaDataArray[2]); arenaInstance.targetX = int.Parse(arenaDataArray[3]); arenaInstance.targetZ = int.Parse(arenaDataArray[4]); //2 string levelName = ""; if (arenaDataArray.Length <= 5) { if (arenaList.Count != 0) { levelName = "Level " + (arenaList.Count + 1); } else { levelName = "Level 1"; } } else { int i = 0; foreach (string stringFromDataArray in arenaDataArray) { if (i > 4) { levelName = levelName + stringFromDataArray + " "; } i++; } } arenaInstance.levelName = levelName; //3 arenaInstance.arenaFilePath = "file://" + arenaFile.FullName.ToString(); //4 arenaList.Add(arenaInstance); } } - Here you create a new instance of an Arena. As you've done before, the file name is split and used to populate the class variables.
- For the arena name, you test the number of items in the split file name. If it's less than 6, there is no level name and a default name is assigned based on the number of levels already loaded.
- The file path is saved with the arena instance so that the level can be loaded only when required.
- The fully populated arenaInstance is saved into the GameManagers list of arenas.
Back in Start(), add the following to load the first level (if one exists) once all of the files have been sent to their coroutines, right after the foreach loop:
if (arenaList.Count != 0 ) { //1 Destroy(defaultArena); StartCoroutine("LoadLevel", arenaList[0]); } Add this final Coroutine to load an arena:
IEnumerator LoadLevel(Arena arenaToLoad) { arenaName = arenaToLoad.levelName; //2 loadingScreen.SetActive(true); gameOverScreen.SetActive(false); winScreen.SetActive(false); //3 foreach (Transform child in arenaTiles.transform) { GameObject.Destroy(child.gameObject); } //4 WWW www = new WWW(arenaToLoad.arenaFilePath); yield return www; arenaTexture = www.texture; Color[] arenaData = arenaTexture.GetPixels(); //5 int x = 0; foreach (Color color in arenaData) { int xPosition = ((x + 1) % 100); if (xPosition == 0) { xPosition = 100; } int zPosition = (x / 100) + 1; //6 if (color.a < 0.1f) { GameObject.Instantiate(floorPrefab, new Vector3(xPosition / 1.0f, 0.0f, zPosition / 1.0f), Quaternion.Euler(90, 0, 0), arenaTiles.transform); } else { if (color.r > 0.9f && color.g > 0.9f && color.b < 0.1f) { } else if (color.r > 0.9f && color.g < 0.1f && color.b < 0.1f) { GameObject.Instantiate(mineTilePrefab, new Vector3(xPosition / 1.0f, 0.0f, zPosition / 1.0f), Quaternion.identity, arenaTiles.transform); } else if (color.r < 0.1f && color.g > 0.9f && color.b < 0.1f) { GameObject.Instantiate(weakWallPrefab, new Vector3(xPosition / 1.0f, 0.0f, zPosition / 1.0f), Quaternion.identity, arenaTiles.transform); } else if (color.r < 0.1f && color.g < 0.1f && color.b > 0.9f) { GameObject.Instantiate(weakFloorPrefab, new Vector3(xPosition / 1.0f, 0.0f, zPosition / 1.0f), Quaternion.identity, arenaTiles.transform); } else { GameObject.Instantiate(wallPrefab, new Vector3(xPosition / 1.0f, 0.0f, zPosition / 1.0f), Quaternion.identity, arenaTiles.transform); } } x++; } //7 StartCoroutine("RemoveLoadingScreen"); Time.timeScale = 1.0f; //8 playerTank.transform.position = new Vector3(arenaToLoad.startX / 1.0f, 1.0f, (100 - arenaToLoad.startZ) / 1.0f); playerTank.transform.localRotation = Quaternion.Euler(0.0f, 0.0f, 0.0f); target.transform.position = new Vector3(arenaToLoad.targetX / 1.0f, 0.6f, (100 - arenaToLoad.targetZ) / 1.0f); } - I bet you have been looking forward to this.
Destroythe default arena! - Since this method could also be called when you complete a level, you reapply the loading screen and remove the win or game over screen.
- Remove any existing Arena tiles in the scene.
- You load the texture from the saved file path and
getPixelscaptures all of the pixel data. This process reduces the 2D 100 x 100 pixels image into a 1D list of color values. - Iterate over the list of pixel data. You use the index value to determine where the pixel would be in 2D space. The correct tile can then be instantiated in the correct position in the scene.
- The color value of the pixel will determine which tile you should instantiate. Since some image editors may bleed adjacent pixels, you include a small margin of error. The conditionals check the pixel's color value and instantiate the applicable tile in the correct position.
- Once you've processed all the pixel data, call
RemoveLoadingScreen()to drop the screen after a second and resume gameplay. - Move the player's tank and the target tile into their respective positions as recorded in their
Arenainstance.

You're almost there! Find the empty function StartNextLevel and add the following code:
//1 if (arenaList.Count >= currentLevel + 1) { currentLevel++; StartCoroutine("LoadLevel", arenaList[currentLevel - 1]); } else { SceneManager.LoadScene("MainScene"); } //2 Rigidbody playerRB = playerTank.GetComponent<Rigidbody>(); playerRB.isKinematic = true; playerRB.isKinematic = false; - Once a level is completed, check to see if another level exists. If so, pass it to
LoadLevel(). Otherwise, reload the entire scene to start over at the first level. - There may be residual input applied to the tank when restarting or transitioning between levels. Toggle the player's Rigidbody from kinematic to non-kinematic to zero this out.
Now that StartNextLevel() is fleshed out a little, type "Next" into the Hierachy Window Searchbar in Unity. This should filter down to a single Game Object named Next Level Button. Click to select it, and in the inspector tick interactable under the Button component.
You now need to make a few code amendments to accommodate the fact that you can now have multiple levels (and not just the original starter level).
Replace SceneManager.LoadScene("MainScene"); in RestartLevel() with the following:
if (arenaList.Count != 0) { StartCoroutine("LoadLevel", arenaList[currentLevel - 1]); } else { SceneManager.LoadScene("MainScene"); } This code ensures that instead of just loading the game scene with the default starter level on level restart, the LoadLevel() coroutine is called instead, which destroys the default arena, and replaces it with the content of the custom level that was loaded from streaming assets.
Also replace timerText.text = arenaName + " " + formattedTime; in UpdateTimerUI() with the following line:
timerText.text = arenaList[currentLevel-1].levelName + " " + formattedTime; This bit of code will ensure that the level name text label in the game UI is updated with the custom level name.
Before you get excited and press Play, don't forget to connect up the prefab outlets in the inspector.
Select the Prefabs folder in the Project Window, and select the Game Manager in the Hierarchy Window. This should expose everything you need.
In the Inspector, you will find the variables for the prefab arena tiles under the Arena Prefabs heading. Each of these has an identically named prefab in the Prefabs folder in the Project Window. Drag each one from the Prefab folder to their respective variable.
Next, take a look at the Arena Objects header in the Inspector. These three GameObject variables are found in the Hierarchy Window. Drag the Target, Default Arena and ArenaTiles from the Hierarchy Window to their respective variables in the Inspector.
Click play and see your designs come to life!

Adding Custom Assets to a Real Build
To wrap this tutorial up, you'll add some custom assets to a real build. After all, that's what your users will be doing!
Remove all of the custom assets from the Project Window StreamingAssets folder and click on File\Build Settings. Ensure the Target Platform is correctly assigned to the platform you are working on and click Build and Run.
You're back to square one! However, the code is still in place to handle any customizations you many want to add.
Navigate to the StreamingAssets folder in the Player Build. On a PC, have a look in the accompanying folder named <SaveName>_Data. On the Mac, right-click the player and click Show Package Contents. From the popup Finder window, navigate to Contents\Resources\Data.
Drop in any or all of the custom assets you've used from the starter project download (under the TankArenaAllAssets folder).
Launch the player again; the customizations should be correctly applied and custom levels loaded. Perfect. :]
Where to Go From Here?
Here's a link to the completed project from this tutorial.
In this tutorial, you learned how to use the streaming assets to customize an existing game in a number of ways. Now you can open that door to your users!
I hope you found this tutorial useful! I'd love to know how it helped you develop something cool. Questions, thoughts or improvements are most welcome in the comments below!

One last thing. If you're interested in learning more about creating killer games with Unity, check out our book, Unity Games By Tutorials.
In this book, you create four complete games from scratch:
- A twin-stick shooter
- A first-person shooter
- A tower defense game (with VR support!)
- A 2D platformer
By the end of this book, you'll be ready to make your own games for Windows, macOS, iOS, and more!
This book is for complete beginners to Unity, as well as for those who'd like to bring their Unity skills to a professional level. The book assumes you have some prior programming experience (in a language of your choice).
raywenderlich.com Weekly
The raywenderlich.com newsletter is the easiest way to stay up-to-date on everything you need to know as a mobile developer.
Get a weekly digest of our tutorials and courses, and receive a free in-depth email course as a bonus!
How To Create Assets For Unity
Source: https://www.raywenderlich.com/479-using-streaming-assets-in-unity
Posted by: grissomfrinslazince.blogspot.com
0 Response to "How To Create Assets For Unity"
Post a Comment