

How To Create A New Calendar In Outlook 2013
Share on 


A shared calendar is a calendar that is shared to one or more individuals. A shared calendar is a great tool that promotes collaboration, productivity, and the development of time management skills. Overall, Outlook shared calendars is a useful asset for a team or company of any size.
This guide shows how to create shared calendars in Outlook.
Instructions
Creating the Calendar
- Launch Outlook Desktop.
- Click the calendar icon in navigation panel in the bottom-left corner of the window. Outlook will then display calendar view.
- Click +Open Calendar in the ribbon > Create New Blank Calendar. (See figure below.)
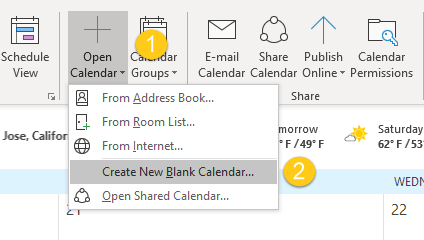
NOTE: In the Simplified Ribbon, click +Add > Create New Blank Calendar.
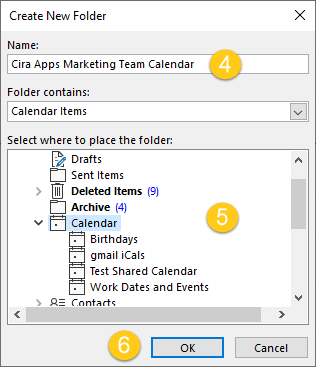
- Name the calendar. In this example, the calendar is called Cira Apps Marketing Team Calendar.
- Select where to place the calendar. In this example, the calendar will be a subfolder of the main calendar folder.
- Click OK. (See figure below.)
- Click the calendar that was just created in the navigation panel to open the calendar.
- Click New Appointment, New Meeting, or New Items to add events to the calendar.
Sharing the Calendar w/ Read-Only Access
- Click Share Calendar in the ribbon. A blank email invitation will open. (See figure below.)
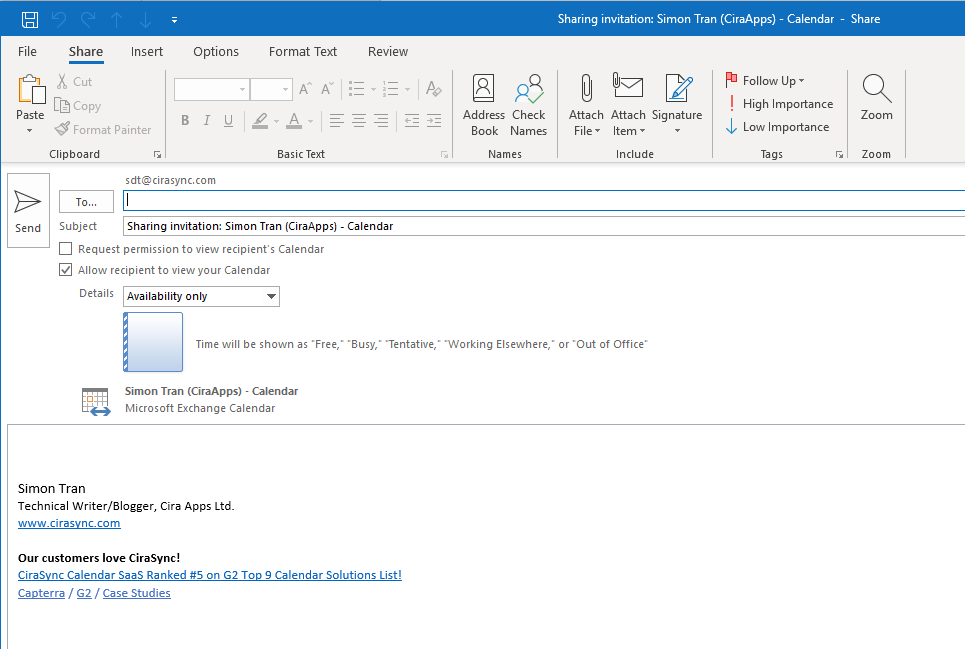
- Define the recipients of the shared calendar in the Tofield.
NOTE: A shared calendar can be shared with a single user, users, or a user group.
- Click the drop-down arrow under Details and select recipient's viewing permissions.
NOTE: A request to view the recipient's calendar can be sent along with this invitation by clicking the Request permission to view recipient's Calendar checkbox.
- ClickSend.
Sharing the Calendar w/ Delegated Permissions and Access
- In calendar view, right-click the calendar created in the Creating the Calendar section of this guide in the navigation panel.
- ClickProperties.
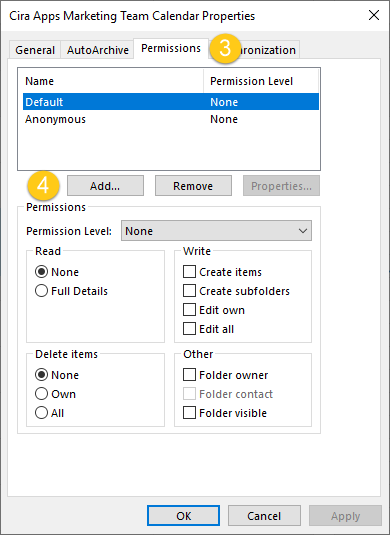
- Click the Permissionstab.
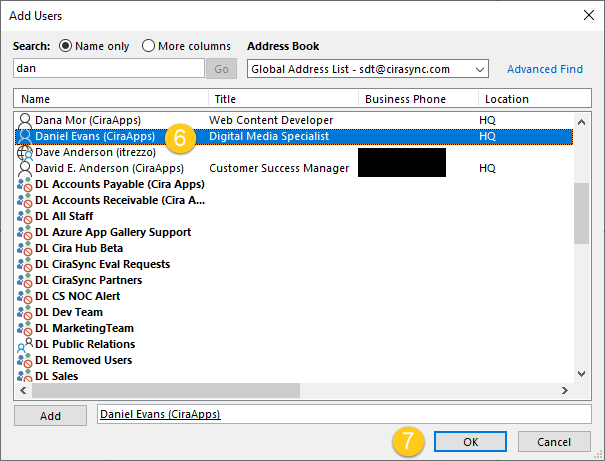
- ClickAdd. (See figure below.)
- Search for the user(s) or group(s) to share the calendar to.
- Double-click the username/group name to add.
- Click OK when all desired users have been added. (See figure below.)
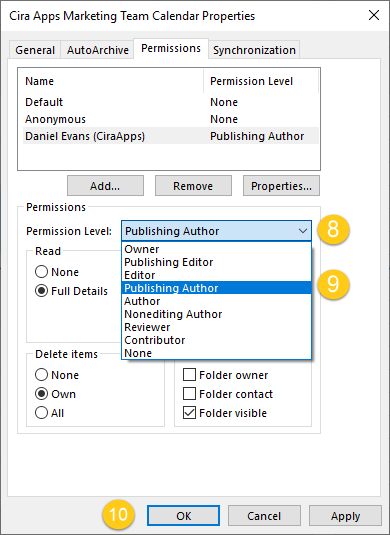
- Click the drop-down arrow in Permission Level.
- Choose the permission level to assign to the added user. In this example, the user is assigned the Publishing Author permission level.
NOTE: If sharing with multiple users, click the entry for each recipient to be able to delegate their viewing and editing permissions.
- ClickOK.(See figure below.)
If you and your team have a set of calendars that you all use together, you may want to use a calendar group. Calendar Groups are great for teams because it allows you to see combined schedules at a glance. Check out our blog post on Creating an Outlook Calendar Group!

Sync Office 365 Shared Calendars to your smartphone in less than 2 minutes
Try Personal Edition for free. No contract, credit card required.
How To Create A New Calendar In Outlook 2013
Source: https://cirasync.com/blog-articles/calendar-synchronization/how-to-create-a-shared-calendar-in-outlook/
Posted by: grissomfrinslazince.blogspot.com
0 Response to "How To Create A New Calendar In Outlook 2013"
Post a Comment